How To Install Custom Module in Odoo.sh
You can follow this step to deploy custom Odoo module that you've bought from Odoo Appstore. This also can be work for free modules.
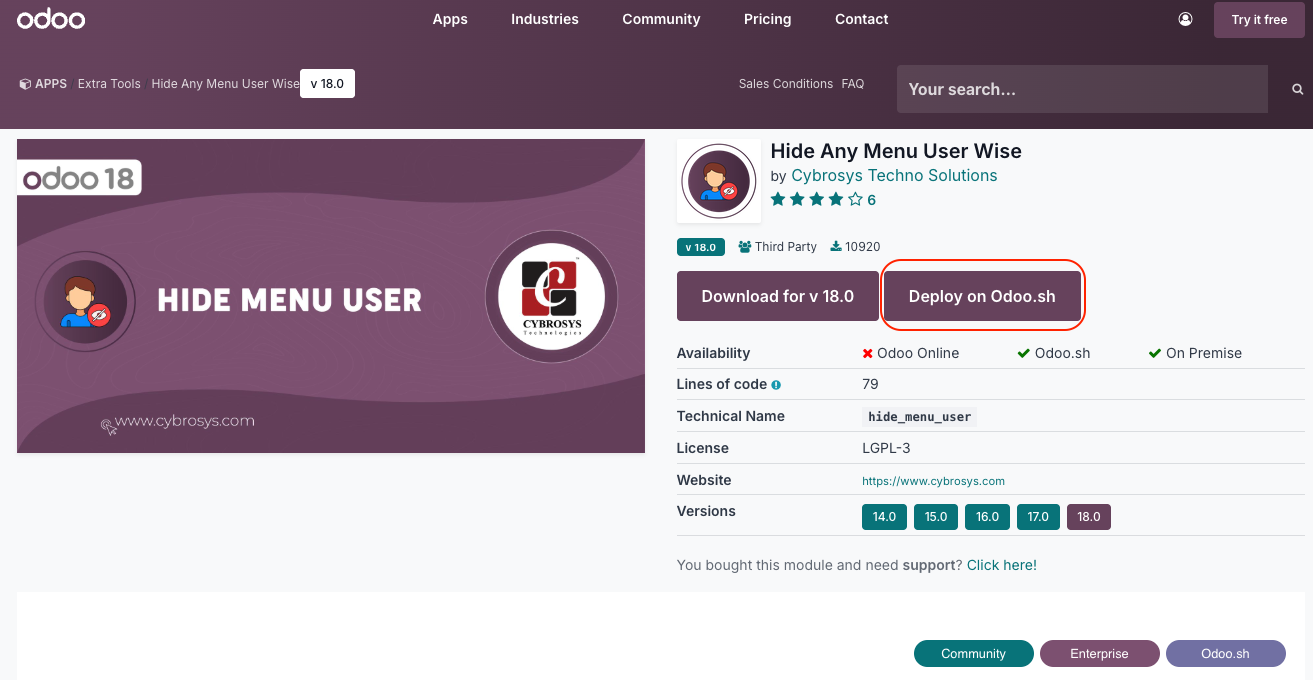
First of all, go to the module page. In this example we are going to use a free module like the picture below.
Click on "Deploy on Odoo.sh", and also make sure you are selecting the correct version.
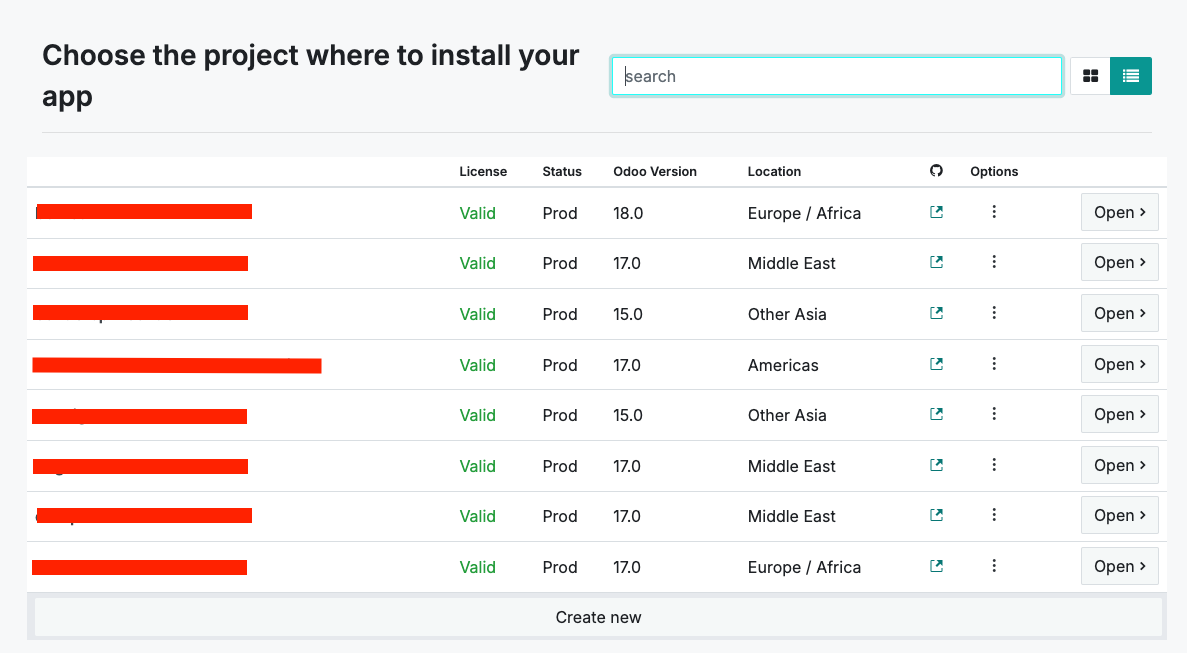
If you are logged in, you will be redirected to Odoo.sh project menu. Please select your server. When you think its correct, click Open.
After that, you will be redirected to odoo.sh server. This pop up will appear, click continue.
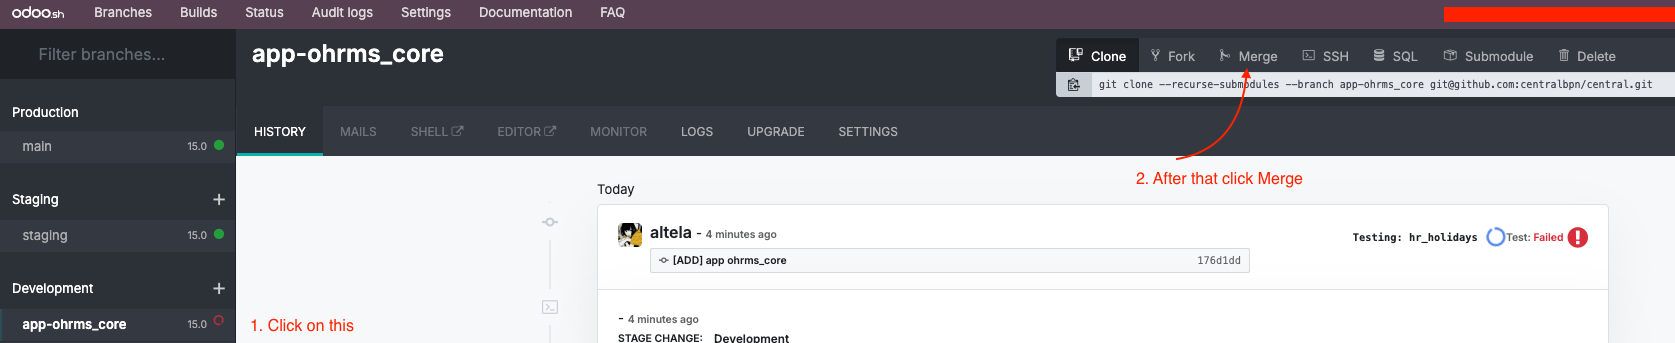
Then, in the left panel, you will notice we have three different section named main, staging, and development

Main is your live database. This is the place where you are working everyday inputting records and data.
Staging, is a copy of your main. This is purposely created as a sandbox where you can test a new features that laters to be installed (or also called merged, in programmer term) into main section (or also called branch)
Development, is a place where development process are happening. The previous steps we did is resulting that new app into the development stage.
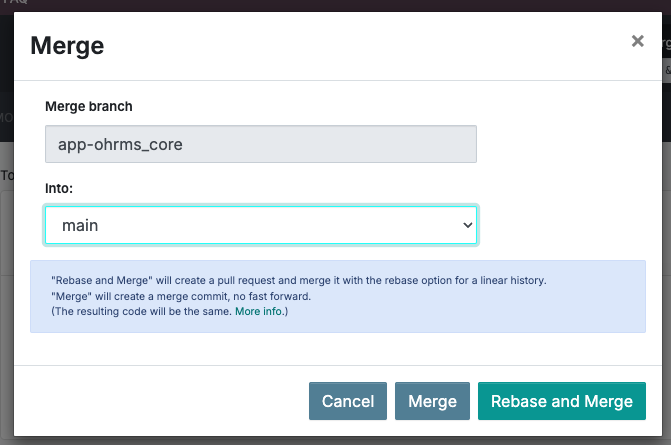
Now, what we'll need to do is we select the development branch (app-ohrms_core) and then select merge as picture below
Then, click on Run On Odoo.sh

We are about to merge the dev branch into main. This also means we are about to put the new module into our live database. Select main, and then click Merge.
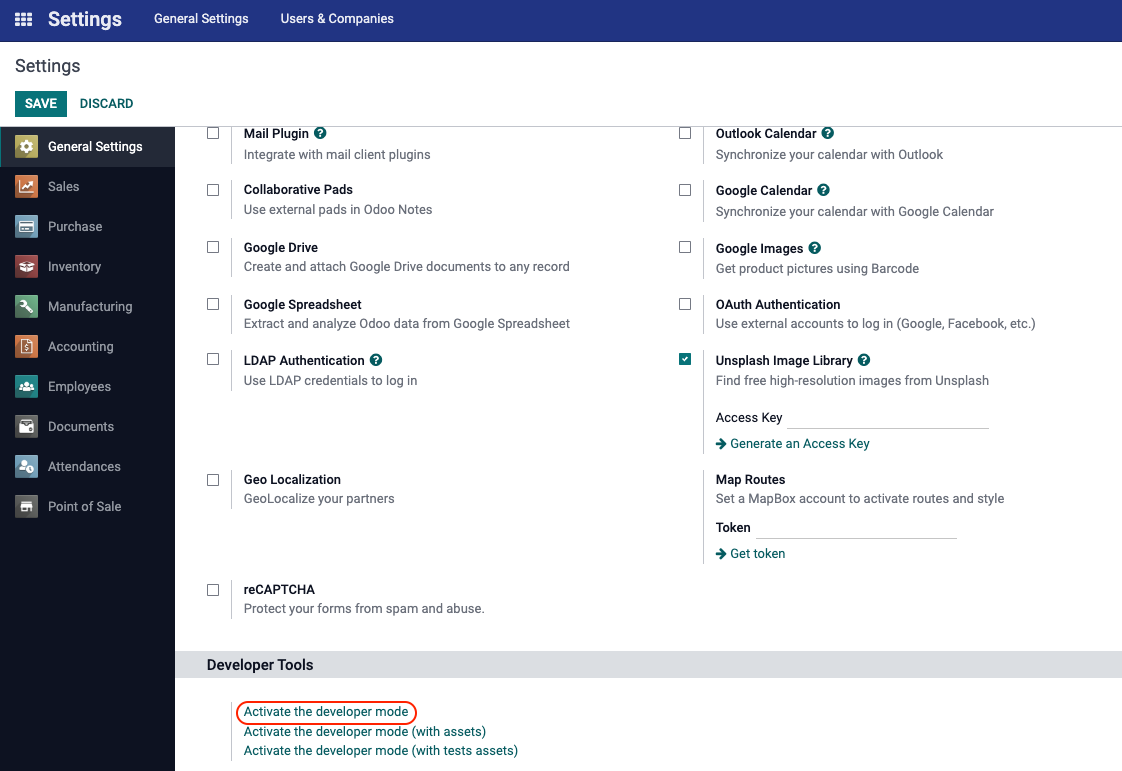
Now, log into your Odoo using your main administrator account. Enable the debug mode by go to settings menu > scroll down until you find "Activate the Developer Mode". Click on it
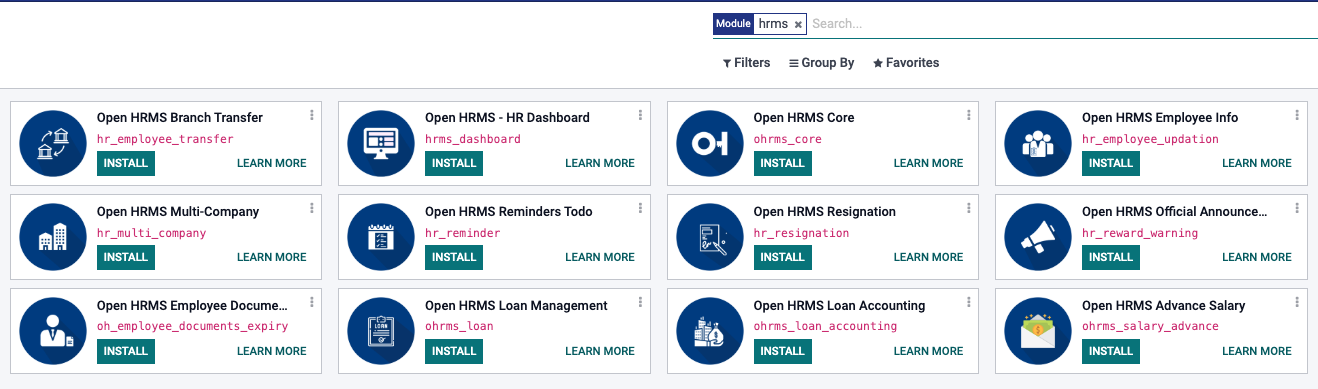
Go to the apps menu

After that, click on "Update App List" on the top of the header

Type the module name in the search bar and it will appear. Simply click install button to install it, and it will soon activated.